Wednesday, March 30, 2011

Best of the best: Makeup brands and products that I dig!

Here's a few of my favourite goodies.

For liquid foundations, try: Laura Mercier, Giorgio Armani, Clinique, Illamasqua, or even Revlon. (I really dig their 'Photo-Ready' range)


For powder foundations, try: Illamasqua, Mac, and most of all NYX!


For lipsticks, try:  Mac, NYX, Illamasqua, Revlon, Chi Chi, Nars and YSL.


For bright lip colour, try:
OCC lip tars! you've probably heard a lot of gurus ranting about how great these are, and you betta believe it, gurl! Also, Illamasqua Intense glosses are to die for!

For lip liners, try:
NYX! I don't  use anything else. They're affordable, great to wear, great to apply and have a kickass colour range!
 
For lip gloss, try: Mac lip glasses! Or Illamasqua Sheer gloss.

For blushes, try: Mac, Nyx, Nars or dior!


For brows, try: Nyx powder, Elf powder or Rimmel pencils!
 

For mascara, try: MY ALL TIME FAVOURITE! Cheap and kickass, Rimmel sexy curves!


For lash adhesive, try: Duo or Lashgrip! Nothing works better than latex-based.
 

For false lashes, try: Mac, Red cherry or Ardell. 

For nail polishes, try: Mac, Eyeko, OPI, China Glaze, or Barry M.


For gel eyeliners, try: Mac fluidline!

For liquid liners, try: Eyeko, Rimmel, Milani, NYX or Urban Decay.
 
For pencil liners, try: Mac, NYX, or eyeko!


For eye-shadow primer, try: Urban decay, Elf or NYX.

 
For eye-shadows, try: (ALOT, but my most used are) Nyx, MAC, Urban Decay, Nars, Illamasqua, Smashbox, Elf, Lancome. 


I'll keep you updated with more products such as brushes, contouring powders and creams, concealers and more soon!

Hope this helps a lot of you!

xoxox 

Sunday, February 6, 2011

How to: Lashes for beginners

After many girls asking me time after time how to apply lashes, I thought I would put together a little step by step of the way I like to apply mine. So here it is, I can finally prove to you all it really isn't all that difficult! :p


( I am using Sassi lashes #79, black duo adhesive and rimmel sexy curves mascara - not pictured)

The best time to apply your lashes is after your makeup is complete, you don't want to have eyeshadow fallout all over them!
Applying mascara first will help support them, and is also better if you want to re-use your lashes.
Curling your lashes beforehand can be helpful, too.


Gently remove your lashes from the box with a pair of tweezers, pulling on the band, not the lash hairs. (You don't want to damage any or pull any out)

If you have a smaller eye you may need to trim the band of your lash, so that it fits comfortably.
To do this, just hold the lash up to your eye, you will easily be able to see if it is too long or not. If so, use a pair of small cosmetic scissors to carefully cut the band shorter. (the band, not the lashes!)


This next step is not essential, but your eyelashes are going to position a lot better if you bend/curve them into the right shape, beforehand. You can gently wrap them around your finger, or even a makeup brush. Just remember to be gentle!
This will especially help with lashes that have thicker bands. (Invisi-bands are usually fine on their own.)


Apply a thin layer of adhesive ( i recommend duo or lashgrip) along the band of your lash, one at a time.
Having the right glue is a must.
If your glue doesn't have an applicator like mine, you can always squeeze a little dollop onto the back of your hand, and apply it with the back of your tweezers.

Wait 10-15 seconds for the glue to start drying, they will apply best just before your glue is about to set. You want them to be "tacky" when applying, not wet, or they will just slip everywhere and make a mess!

With your tweezers, apply your lashes as close to your natural lash line as possible, so that there is no gaps or spaces.
Apply the middle first, then press down the outer and inner corners.
(the inner corner is always the hardest, and easiest to slip, so really make sure it is secure)


Continue to press down on them with your tweezers until they are dry and secure. (a cotton tip, orange stick or even your finger is okay, too)


If you are applying your mascara AFTERWARD:
Press your finger behind the fake lash. This will blend the false lashes into yours and avoid any messy clumps getting on your eyelid. Just be careful not to smudge your makeup you applied beforehand! ;)


You can now fill in any gaps or neaten up your eyeliner over the top. This will help disguise the band, also.


You are now done! It wont be long til you have the hang of it and feel confident to wear lashes any time you please!


Removing your lashes:

Using your tweezers or your fingers, start from the inside and gently peel them off. The latex based adhesive will not hurt at all, you can then remove the excess from the lash, too, it will peel straight off like rubber.

You can re store them in the original packaging again for later use. Try not to bend them out of shape too much.


So there you have it! I suppose it can look a little trickier than it actually is, but hope this helps you all! There are SO many beautiful false eyelashes available, don't be afraid to try them! They can take even the most basic makeup to the next level.


Thursday, January 20, 2011

GOODIES UNDER $20 - Rimmel Colour Show Off Lipstick - Kiss Me (140) - Swatch

Rimmel Colour Show Off Lipsticks R.R.P at about $13 here in Australia.

These lipsticks were a big surprise to me! In the past I have been dissapointed with some Rimmel colours, but I really like this range! (http://www.rimmellondon.com/uk/products/lips/Lipsticks/Colour+Show+Off.aspx)

Cute pink packaging, cute Watermelon smell and Cute colour range! Highly pigmented colours with a rich creme texture.

Doesn't last all day but still has a decent staying power. (After-all, it is a creme based lippie!)

I own two colours from this range, SHOCKING PINK and KISS ME (swatched below) and i'm pretty sure I will be coming back for more.

I recomend this to anybody who wants a punch of colour to an everyday look. Well worth checking out!


Wednesday, January 19, 2011

TRIAL AND REVIEW: HELLCAT COSMETICS PUNK-ASS PAINTS

Hey everyone!

I recently received a parcel of goodies from my buddies From Hellcat Cosmetics -A new australian alternative makeup label. What I have sampled from their products so far I have fallen in love with, so I was really excited to try out the new Punk-ass paints range. The lovely ladies sent me a sample in each color, much to my delight!!
First thing I noticed were the super cute labels - of course i'm a sucker for things like that! Electric pink zebra with "The Cramps" style font? Yes please!

The second thing I noticed (as soon as I dipped my liner brush into the pot) was how soft and silky the formula was. At first that made me a little weary as to how bright the color would turn out, as I have been disappointed with colored gels and paints before.

However, as soon as I put brush to skin, I was immediately impressed. Colors so bright they were almost shocking!.. and you all know me, i'm all about BRIGHT!

A smooth gliding formula, that sets matte dry in moments. Little product is needed for a bright effect, which means at $16.99 AUD you're getting more for your buy and a longer lasting product. Definitely a product I will be stocking my kit with from now on. My favorites being the Lollypop pink, Agent Orange and Grasshopper green.

For anyone wondering what these could be used for, there are a number of things. Bases to softer or metallic products would be best, but because they are waterproof and set, they can even be worn on their own. Great for a lid color on a cut crease, without that stiff, weird feeling.

Another great idea to spice up a basic look is to use these to add a pop of color to your waterline.

I would also recommend these to any face painters. Great for Halloween time or masquerade styles.

All in all, what really impressed me is the way these gels blend! Take a look for yourselves...


Even with a quick smudge of the finger they blend together quite well!

Heres some color swatches of the whole colour range:


Everything is quite bright and matte, however the Tsunami has a lovely metallic sheen to it which would be beautiful for dark smokey eyes.

In conclusion: These "Punk-Ass Paints" are a great all around, multi-use product, that any alternative girl or fan of bright colors would love!

Thank you Hellcat, you've impressed me, again!

..and thanks for reading! Stay tuned for my next review for tomorrow, on Rimmel Mascaras!

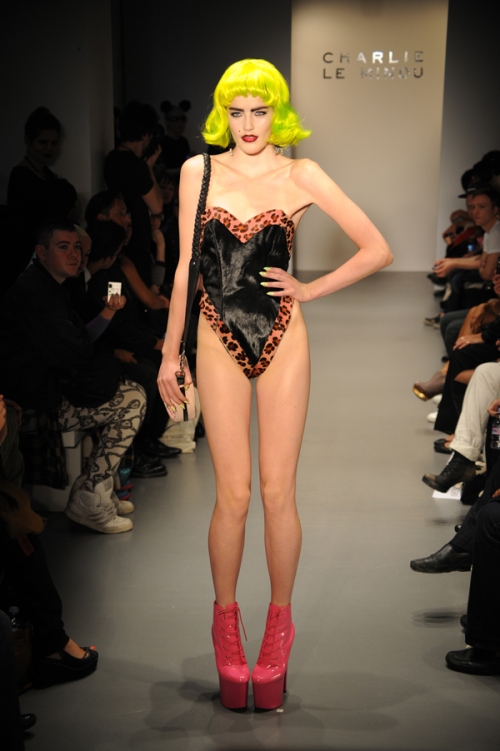
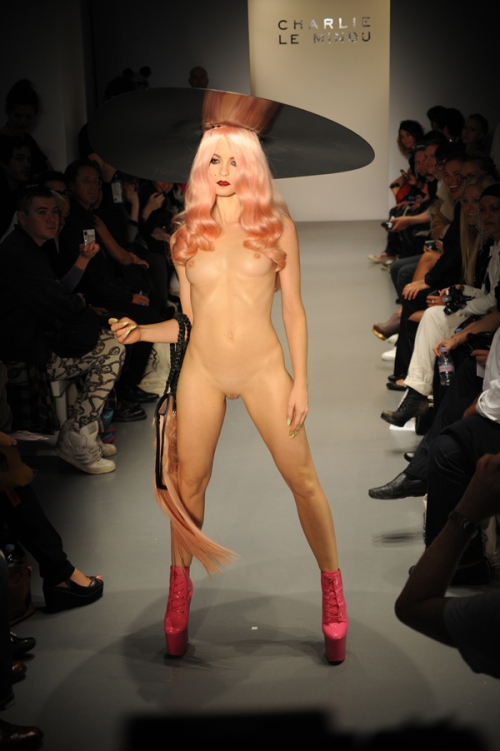
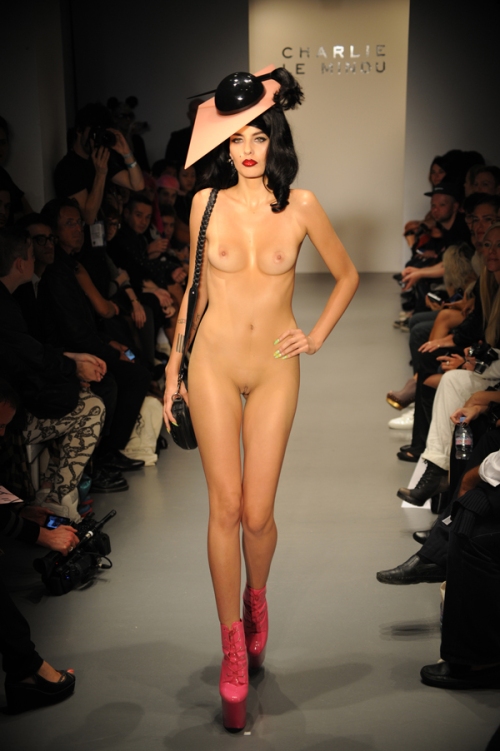
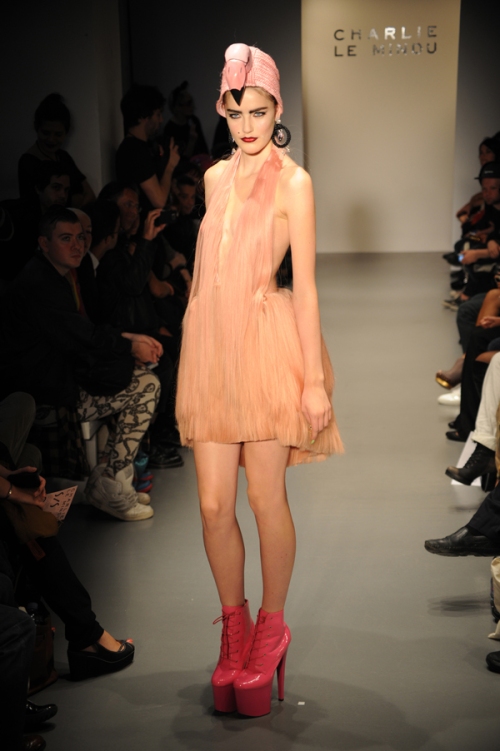
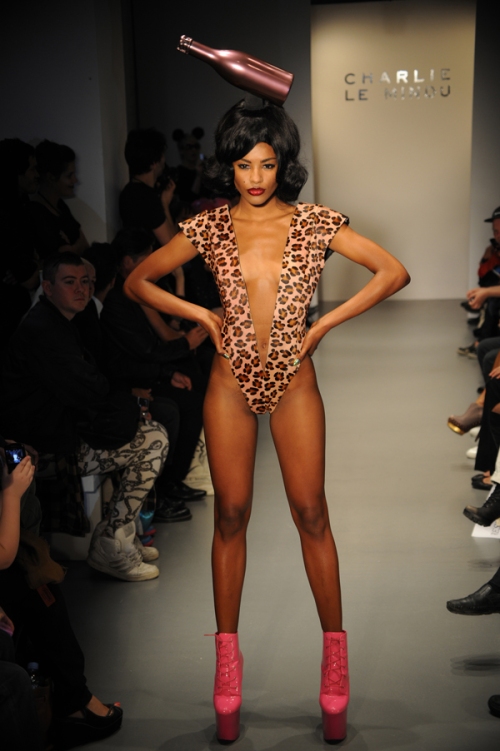
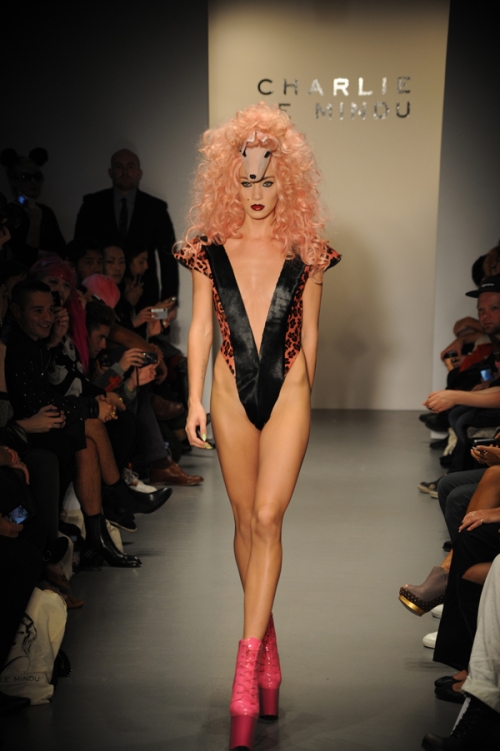
Charli Le Mindu 2011 Looks! (SS11)

I have been a big fan of Charli Le Mindu's designs from the first minute I ever saw them. Being a fan of everything kitsch and tacky, so seeing this collection made me fall in love all over again.
Everything is so god-damn adorable! From flamingos to stripper platforms to leopard print, my god.. I feel like they had somehow found a list of everything I've ever loved and incorporated it into one range. (Psht. Yeah, right!)

Here's some of my favourites.


(All images by Tom Vandeputte)


As for the makeup - I absoloutely love it. I have always been a fan of cat eyes , dramatic brows and black/red lips.
To describe it, it's just like a Lichtenstein painting or a 60s style Barbie!

Whiiiiiich brings me to my whole point here, this will be the inspiration for my next makeup tutorial!

I had a quick little play around with it tonight. (Excuse the low quality picture, I said it was a quick one!)

I will re-do this look tomorrow night along with the step by step video for you all to check out! So keep your eyes out for it.


Hope you love this range just as much as I do! xxxx

Sunday, January 16, 2011

Favorite product of the week 17/1

Revlon Matte - “Pink Pout”
Retails at about $21.99


Three reasons why I love it so much.
— It’s such an adorable shade of baby pink with a tiny hint of lilac. This is a colour I have spent FOREVER trying to find!
— The consistency is fabulous! I was a little hesitant at first to try this range as Revlon colours have let me down in the past. I am more than impressed, now owning nearly ever colour in the range.
— It’s long lasting - I can wear this to work all day without having to re apply.
Check it out!!! You won't regret it.